You only need 7 ingredients to make these homemade Hoagie Rolls. With thin, even, golden-brown crust and a soft, pillowy interior, these Hoagie Rolls shine in any larger filled sandwiches, including subs, heroes, grinders, and cheesesteaks. Once you try baking them yourself, you’ll never want to go back to store-bought. Read this blog post to learn more about Hoagie Roll, including step-by-step recipe, freezing, and make-ahead instructions. You can also reference the FAQs section below for gluten-free and whole wheat option.
This post may contain affiliate links. Read our disclosure policy.
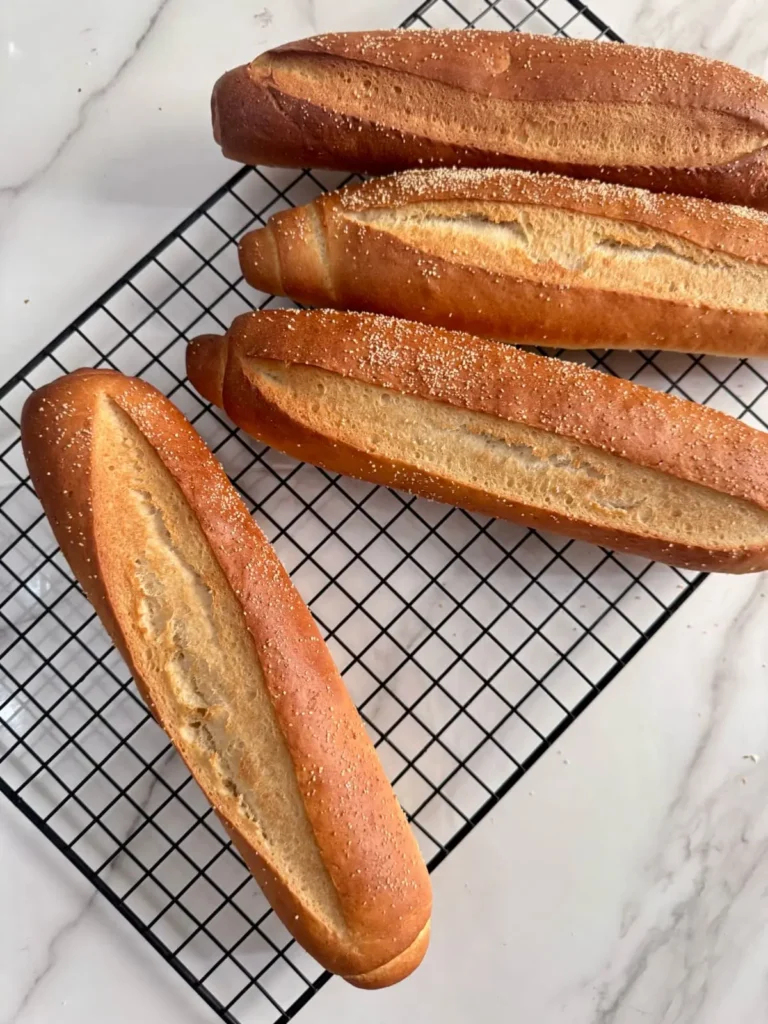
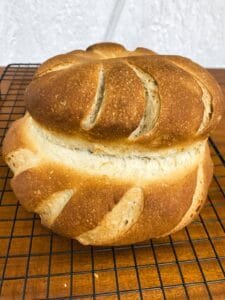
The moment when a fresh baking sheet of rolls comes out from the oven is one of the best parts of making sandwich rolls recipes. If you’ve ever tried my Mexican bolillo rolls or my soft milk brioche rolls, you know exactly what I mean. Each type of sandwich roll comes with its own unique flavor, texture, and story. I love baking those fan-favorite bread rolls, and the best part is, you only need 7 ingredients to make these homemade hoagie rolls at home.
These aren’t fancy bakery rolls, they’re everyday hoagie rolls—simple, soft, pillowy, and absolutely perfect to soak up flavor and hold every filling.

These Homemade Hoagie Rolls Are:
- chewy, soft, and pillowy on the inside, with a delicate crust that gives way easily when bitten
- Extra flavor from olive oil in the dough and milk wash before baking
- Delicious on their own, dipped in sauce, and perfect for hearty, sauce-filled sandwiches
- Simple to make, make it perfect for bread-making beginners new to working with rich dough.
Just 7 Ingredients for These Hoagie Rolls
This hoagie roll dough comes together with just 7 ingredients. It uses one more ingredient than my Swiss Zopf and Milk Brioche Rolls recipes, which are also made from enriched dough. (No egg needed, but you’ll need a combination of water & whole milk as a liquid base in this recipe)
- Liquids: I use whole milk & water for a nice, soft texture. Use a warmed liquid to about 110°F (43°C) to achieve the perfect hoagie roll texture—soft interior and chewy crust!
- Yeast: You need 2 and 1/4 teaspoons of instant dry yeast or active yeast. If using active dry yeast, the rise times will be a little longer.
- Flour: You can use all-purpose flour or bread flour in this recipe, but bread flour produces chewier rolls—all-purpose flour is the best for this recipe. There are no other changes to the recipe, and either type can be substituted.
- Salt: You can’t make flavorful rolls without salt!
- Sugar: Sugar feeds the yeast, increases its activity during the rise time, and tenderizes the dough. Plus, it gives these hoagie rolls a sweet taste.
- Fat: Fat promises flavorful, soft rolls. I use olive oil for a savory flavor that pairs well with sandwich ingredients, rather than butter, which adds a buttery, sweet flavor!
Just Before baking hoagie rolls, you need two tablespoons for washing and coarse cornmeal or semolina for sprinkling on top.
Read this article to discover the role of the 8 important ingredients in bread making.
Step-by-Step Photos
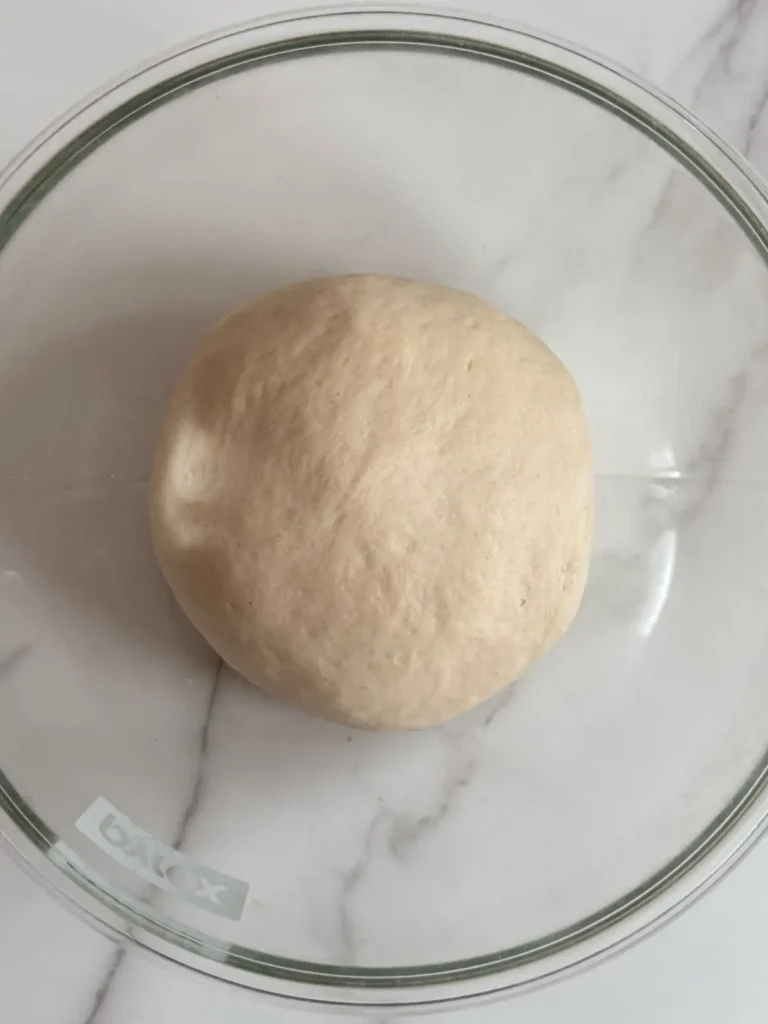
Make and knead the dough, refer to this guide on how to make rich dough when needed. See the photo below to see the texture of the dough at the end of the kneading step. You can chill the dough in the refrigerator overnight or freeze it for up to 3 months.
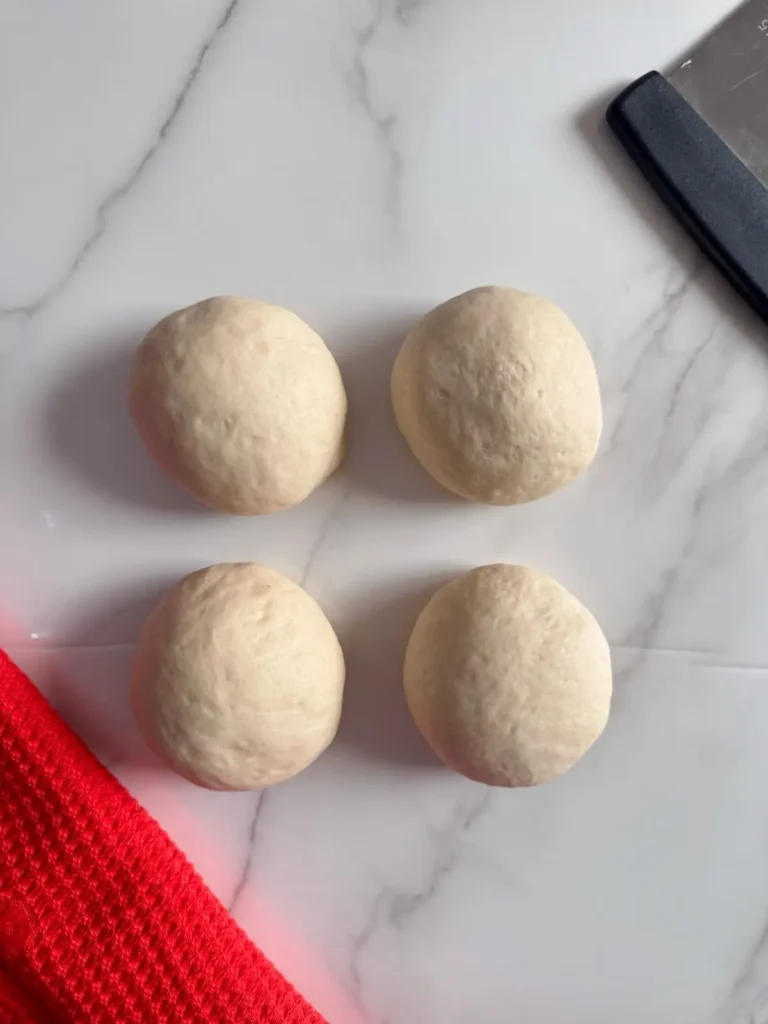
After you punch down the dough, divide into 4 equal pieces and shape each piece into a smooth ball.
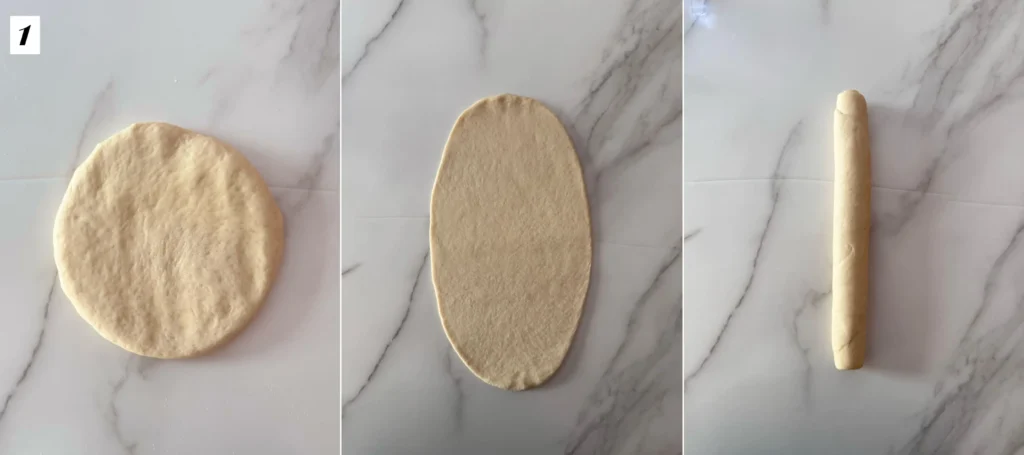
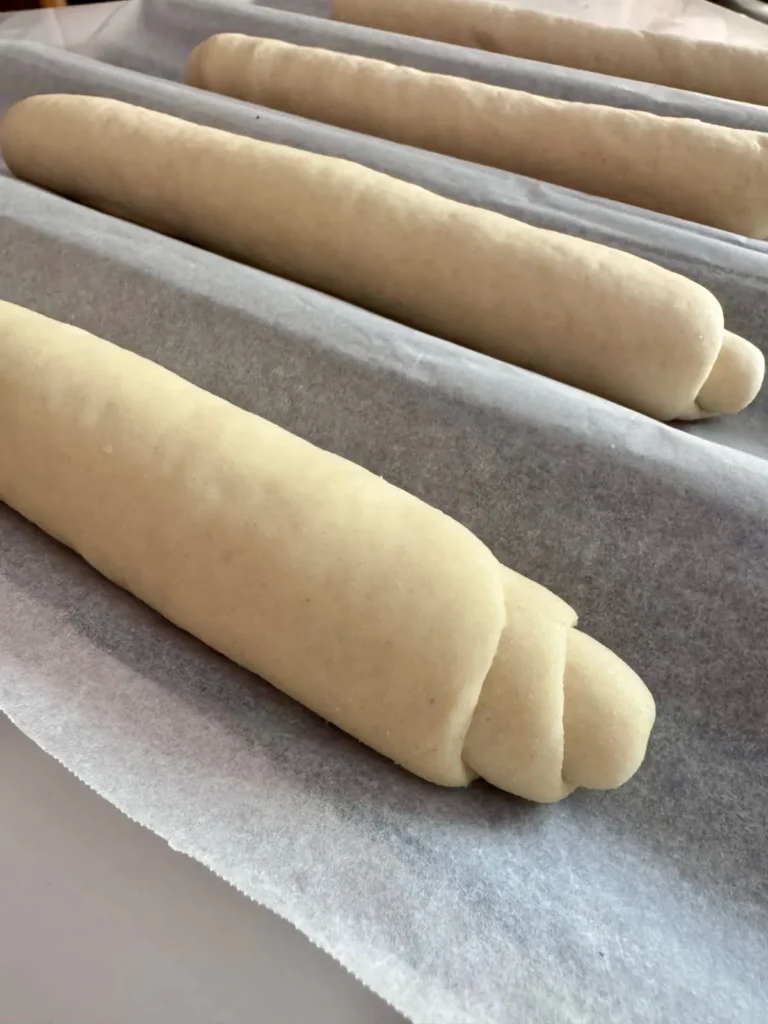
Roll each out into a 6×10 inch rectangle, roll it up into a 6 inch log, and press the seams together to close them, then roll outward to stretch in from the center to toward the edges until you have a 10-inch-long roll.
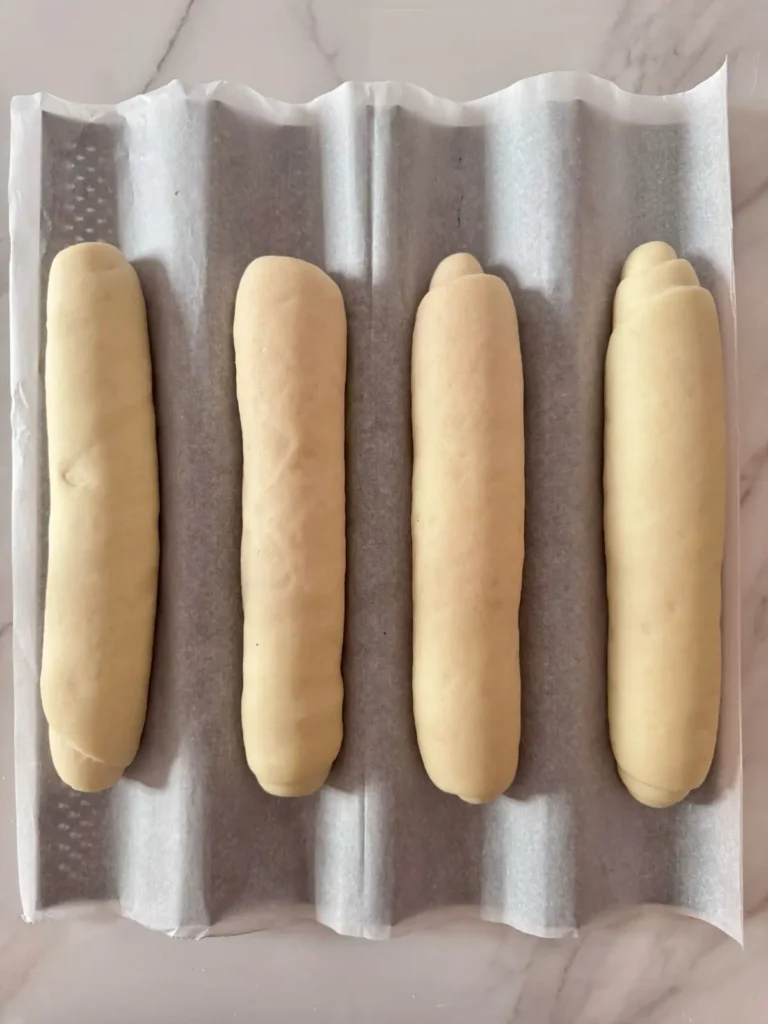
Place the hoagie rolls on a baguette pan and let them rise for about 45 minutes or until doubled in size.
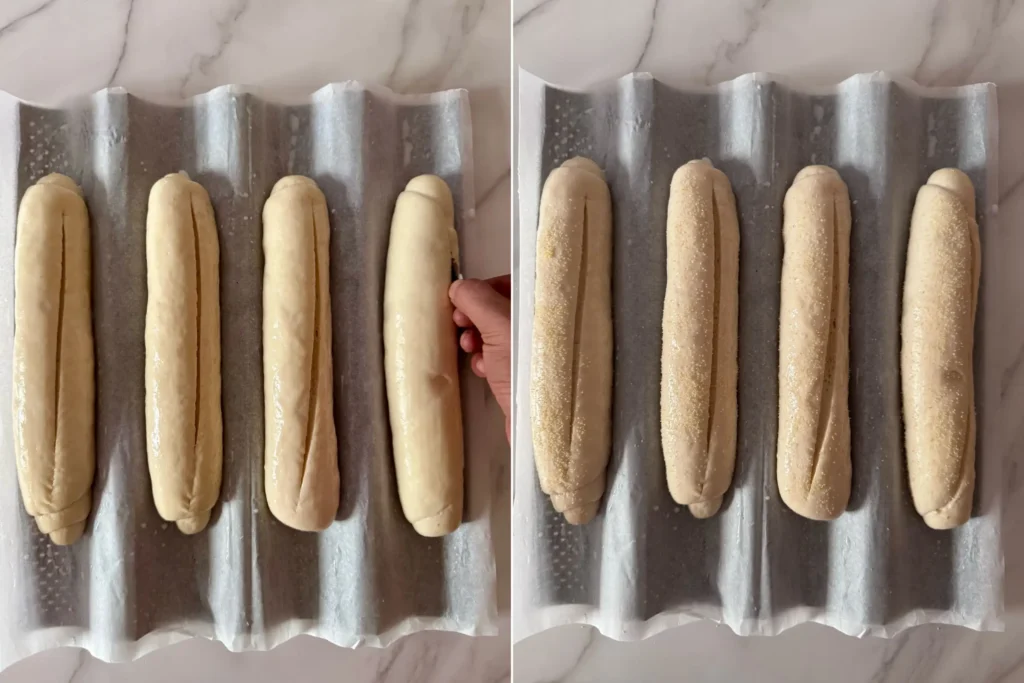
Brush your rolls with a milk wash to give them a golden brown color and help coarse topping stick.
Then, use a bread lame or razor to score each roll with one long slash at a 45-degree angle. Sprinkle the rolls with coarse cornmeal or semolina, you can also use sesame seeds.
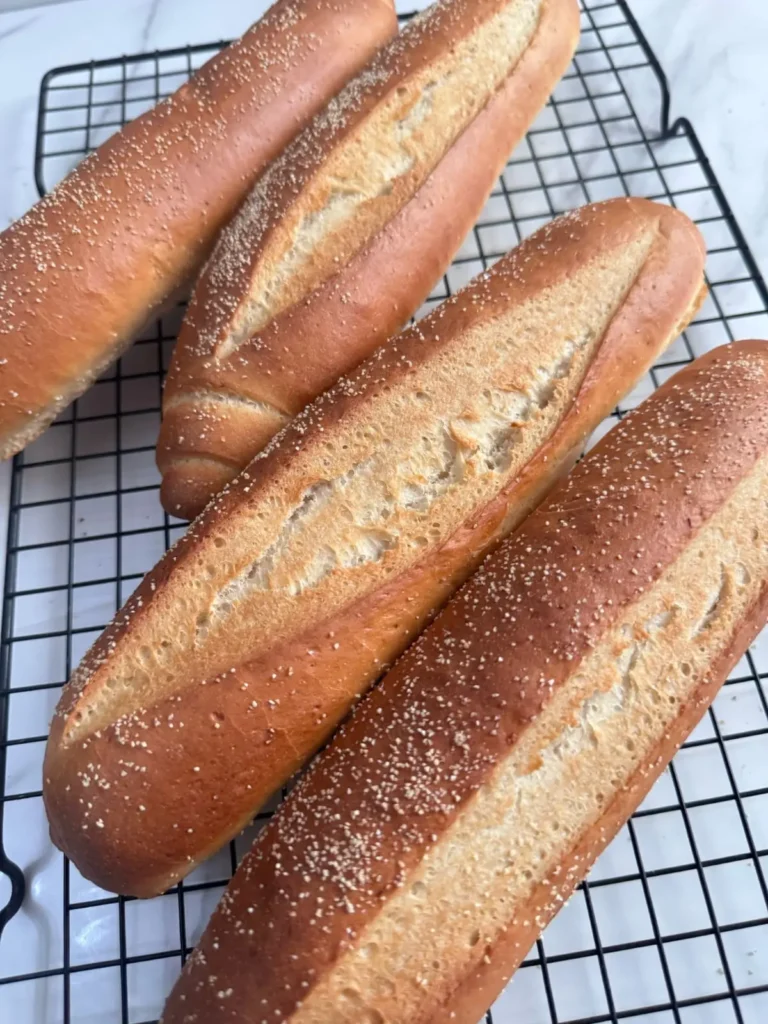
Bake with steam until golden brown, then cool for 2 hours before slicing. They’re so squishy when warm. Italian beef sandwiches and beef and balsamic vinegar sandwiches are my favorites! If you need more sandwich ideas, check out this article from Taste of Home.

3 Success Tips
- Make sure your yeast isn’t expired. Expiration date is printed on the package.
- Use a baguette pan for evenly baked rolls, as it allows hot air to circulate completely around the rolls and ensures your rolls are long, consistent, and do not flatten out. Half-baking sheets may lead to less baking, as they insulate the bottom of the roll from the direct, circulating heat of the oven.
- Measuring flour and liquids correctly is key to avoiding dense or sticky dough. A kitchen scale and liquid measuring cup are helpful.
FAQs
How long do homemade hoagie rolls stay fresh?
Fresh hoagie rolls stay fresh for about 3-4 days at room temperature if stored in an airtight container or well wrapped. For longer storage , you can freeze them for up to 3 months. Just thaw at room temperature for 1 hour and warm them in the oven before serving.
Can I make these hoagie rolls gluten-free?
While I have made many gluten-free bread recipes, I haven’t personally tested a gluten-free version of these hoagie rolls. However, I’ve had great results with other yeast breads using Caputo Gluten-Free flour—it’s my recommended choice for a cup-to-cup substitute. Caputo gluten-free flour gives me the best rise and texture in most recipes designed for wheat flour.
Can I turn this recipe into a whole wheat option?
Absolutely! Simply replace 75% of all-purpose flour with whole wheat flour for a heartier flavor. Keep in mind that whole wheat absorbs more liquid, so you need to add 1 teaspoon water and 1 teaspoon milk to keep your dough soft.

Homemade Hoagie Rolls
Ingredients
- ⅔ cup (160 ml) water, warmed to about 110°F (43°C)
- 3 tablespoons (45ml) whole milk, warmed to about 110°F (43°C)
- 2 and ¼ teaspoons (7grams) active or instant yeast (1 standard packet)
- 2 cup and ¼ cup (390grams) all-purpose flour
- 2 tablespoons (25 grams) granulated sugar
- 1 teaspoon coarse sea salt
- 3 tablespoons (45ml) olive oil
- Topping: 2 tablespoons milk and 2 tablespoons coarse corn meal or coarse semolina flour
Instructions
- Make the dough: Whisk the warm water, milk and yeast together in the bowl of your stand mixer. Cover and allow to sit for 5-10 minutes or until the yeast activate and the mixture becomes foamy. *If you do not own a stand mixer, you can do this in a mixing bowl and in the next step, mix the dough together by hand, or with a silicone spatula or wooden spoon.
- Add the flour, sugar, and salt. With a dough hook, mix the ingredients on low speed for 3- minutes, scrape down the sides of the bowl with a spatula until the flour is well incorporated and all ingredients are combined. If the dough seems too dry, add a tablespoon of water, if it seems too wet, add a tablespoon of flour, until the dough sticks to the dough hook.
- Knead the dough: Set the mixer to medium speed and knead the dough for 4 minutes, or knead by hand on a lightly floured surface for 4 minutes, until it starts to become smooth and the gluten network begins to form. Gradually add the olive oil, one tablespoon at a time, and continue to knead the dough for another 4 minutes. If you are working the dough with a mixer, you may notice that the dough has dropped to the bottom of the bowl. Do not add more flour, as you do not want dry dough. Just continue kneading and use a spatula to help incorporate the olive oil completely. After kneading, the dough should be smooth, similar to the photos above. You can do a “windowpane test” to see if your dough has been kneaded long enough: pinch off a small piece of dough and gently stretch it out. If it stretches thin enough to let light through without tearing, the gluten is well developed and the dough is ready to rise. You can also poke the dough with your finger—if it slowly bounces back, your dough is done. If not, keep kneading until it passes the windowpane test.
- 1st Rise: Flour or grease a large bowl with oil or nonstick spray. Shape the dough into a ball and place it in the bowl. Cover the bowl with plastic wrap, or clean kitchen towel. Allow the dough to rise for 60-90 minutes at room temperature or until doubled in size. You can see the temperature of my house when I prepared this recipe in the note below. If it is more cold at your home, place the bowl in a relatively warm environment for 90-120 minutes or until it doubles in size.
- Line a baguette pan or a half baking sheet with parchment paper, or lightly grease it with oil or nonstick spray. Set it aside.
- Shape the rolls: When the dough is ready, punch it down to release the air. Divide the dough into 4 equal pieces, each weighs about 160 grams. Shape each piece into a smooth ball. (A bench scraper is always helpful for cutting and shaping the dough into balls.) Arrange on your work surface and cover for 10 minutes to make it easier to roll out.
- Take one ball at a time and keep the rest covered. Using a rolling pin, roll out the dough ball into a large rectangle, about 6×10 inches, it will probably be rounded on the edges. There is no need to dust the dough ball with flour at this step if you have kneaded the dough correctly. If your rolled dough seams stick to the work surface, that’s OK! Just lightly flour it! Roll it up into a 6 inch log and press the seams together to close them. Gently roll the shaped roll outward to stretch it from the center toward the edges, so that it reaches a length of 10 inches. (Refer to the photo above for a step-by-step guide on how to shape it) Place the Hoagie roll in the prepared baguette pan. Repeat the process with the remaining rolls.
- 2nd Rise: Cover shaped Hoagie rolls with plastic wrap or a clean kitchen towel. Allow to rise for 45 minutes or until puffy. To check if your dough has risen properly: Gently and quickly press your finger into the side of the dough about 1/2 inch (1 cm) deep, then immediately pull your finger away. If the dough slowly fills back, the dough is ready to bake.
- Place a small baking sheet or oven safe pan at the bottom of the oven. Adjust oven rack to a lower position and preheat the oven to 350°F (177°C). (It is always best to bake yeast breads in the bottom of the oven so that the top does not burn.)
- Wash & score: Brush the tops of the rolls with 2 tablespoons of milk using a pastry brush. Use a bread lame, razor, or sharp knife and score the hoagie rolls with one long slash at a 45 degree angle. Sprinkle the rolls with coarse corn meal or coarse semolina flour.
- Bake: Place the baguette pan on the oven rack and quickly pour 1 cup of hot water or throw a couple ice cubes into the hot baking sheet to create steam. Bake for 18 to 25 minutes, or until the top is golden brown, turning the baguette pan halfway through. If the top browns too quickly, cover the rolls with aluminum foil. Remove from the oven and let cool completely on a wire rack for a 1-2 hours before serving, or store it in an airtight container.


AMAZING recipe, thank you for sharing it! I’ve tested many before and this is one of my favorites.
Looks amazing! Thank you!!
Perfect hoagie roll recipe, turned out amazing! Thank you! 😃