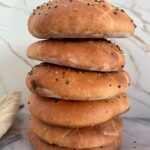
Lepinja (Somun Bread)
Make authentic Bosnian Lepinja flatbread with just a few basic ingredients! This recipe delivers a soft, pocket-like flatbread that’s perfect for prepping ahead. Follow the instructions below and refer to the step-by-step photos above for perfect results.
Servings 6 loaves
Calories 357kcal
Ingredients
Dough
- ¾ cup (180 ml/g) water, warmed to about 110°F (43°C)
- 7 tablespoons (100 ml/g) milk, warmed to about 110°F (43°C)
- 2 and ¼ teaspoons (7 grams) instant or active dry yeast
- 1 tablespoon (12 grams) sugar
- 4 cups (480 grams) all-purpose flour or bread flour, plus more as needed
- 1 and ½ teaspoons (9 grams) salt
- 2 tablespoons (25 grams) olive oil
Toppings
- 1 and ½ tablespoons milk
- 1 teaspoon sesame seeds
- 1 teaspoon black sesame seeds
- 1 teaspoon fennel seeds
Instructions
- Prepare the dough: Whisk together the warm water, warm milk, yeast, and sugar in a large bowl. Cover and allow to sit for 10-15 minutes or until bubbly and foamy on top.
- Add the flour and salt to the yeast mixture. Combine all the ingredients together with a silicone spatula, wooden spoon, or dough whisk for 3-4 minutes or until a shaggy mass forms. Mix in the olive oil until it is fully incorporated (this will help pick up any flour remaining on the sides of the bowl). *If you own a mixer and want to save your arm muscles from kneading, you can do this with your stand mixer fitted with a dough hook at low speed and in the next step, knead the dough at medium speed.
- Knead the dough: Transfer the dough onto a lightly floured surface and knead for 7–8 full minutes, or keep the dough in the mixer and knead at medium speed for an additional 7–8 minutes. If the dough feels too dry and seems impossible to knead, add 1 teaspoon of water at a time to the dough or the mixer bowl until it becomes smooth, elastic, and supple. If the dough is too sticky, sprinkle in 1 teaspoon of flour at a time. Do not add more liquid or flour than necessary, as you want to avoid a dough that is too dry or overly sticky. After kneading, the dough should feel soft. Poke the dough with your finger—if it slowly bounces back, it is ready to rise. If not, continue kneading for another minute.
- 1st Rise: Lightly grease a large bowl with oil or nonstick spray. Shape the dough into a ball and place it in the bowl. Turn the dough over to coat all sides in the oil. Cover and let the dough rise for 60–90 minutes, or until doubled in size.
- Shape the bread: When it is ready, punch down the dough to release the air, then transfer the dough to a lightly floured work surface. Divide the dough into 6 equal pieces, each weighing about 130 grams. Shape each piece into a smooth ball (a bench scraper is always helpful for cutting and shaping the dough). Arrange the balls on your work surface and cover them for 10-20 minutes; this relaxes the gluten and makes the dough balls much easier to roll out.
- Dust an extra-large baking sheet with flour. Do not oil your baking sheet, as the flour prevents Lepinja dough from sticking to the pan during the baking process.
- Take one ball at a time and keep the rest covered to prevent them from drying out. Gently press the dough out with your hands or fingertips into a circle that is ¼ to ½-inch thick (You can also use a rolling pin, but pressing by hand preserves more air bubbles, making the texture lighter. I have tested both methods, and both work successfully). Place it onto the prepared extra-large baking sheet. Repeat this process with the remaining dough balls.
- Use a bench scraper or kitchen knife to press 4 parallel horizontal lines into the top of each dough circle. Rotate the bench scraper and press another 4 parallel horizontal lines to create the traditional diamond pattern (refer to the photos as a guide for this step). Brush the top of each dough circle with milk and sprinkle with seeds.
- 2nd Rise: Cover the shaped Lepinja dough with plastic wrap or a clean kitchen towel. Allow the dough to rise for about 30 minutes or until it looks puffy. To check the rise, gently and quickly press your finger into the side of the dough about 1/2 inch (1 cm) deep, then immediately pull it away. If the indentation fills back slowly, the dough is ready to bake.
- Place the oven baking sheet upside-down in the lowest oven position. Preheat to 482°F (250°C) using conventional heat for at least 30 minutes.
- Bake the bread: Working in two batches, place three Lepinjas directly onto the hot, upside-down baking sheet. Bake for 7–8 minutes until they puff up and turn a beautiful golden brown on top. Start checking your bread at the 6-minute mark to prevent over-baking. Remove from the oven and immediately cover the baked Lepinjas with a clean kitchen towel (This traps the steam and ensures the crust stays soft and pillowy while you bake the rest). Repeat the process with the three remaining dough circles.
- Lepinjas are best eaten the day they are baked. However, you can store leftovers in an airtight container at room temperature for up to 2 days.
Notes
The temperature when I made this recipe: 60 Fahrenheit (16 Celsius).
Make-ahead Instructions: Follow the recipe through step 3. Place the dough in a greased bowl, cover it tightly, and refrigerate for up to 24 hours. When you are ready to shape the dough the next day, remove it from the refrigerator and let it sit on the counter for about 1 hour or until it reaches room temperature again. Continue with step 5.
Freezing Instructions: Baked Lepinja freezes wonderfully! You can freeze baked flatbreads for up to 3 months. To serve, thaw them overnight in the refrigerator or at room temperature, then warm them in the oven at 350°F (175°C) for about 5 minutes until soft. You can also freeze the raw dough. After kneading (following steps 1 through 3), wrap the dough tightly in a freezer-safe bag. Freeze for up to 3 months. When ready to bake, thaw the dough overnight in the refrigerator. The next day, punch the dough down to release any air bubbles and continue with the shaping process in step 5.
Special Tools (affiliate links): Kitchen Scale / Measuring Cups & Spoons | Steel / Glass Mixing Bowl with a Wooden Spoon / Silicone Spatula / Dough whisk or Stand Mixer | Bench Scraper | Rolling Pin | Pastry Brush.
